Plugins | Setup ESRI ArcSDE Plugin
For Windows (32-bit, only available for ArcSDE 9.3):
- Download ESRI ArcSDE Client 9.3 for Windows from ESRI CD-ROM
- Double click the setup executable file. The ESRI ArcSDE client will be installed to your local hard disk. For example: C:\Program Files\ArcGIS\ArcSDE
- Setup your Windows system environment for ESRI ArcSDE Client
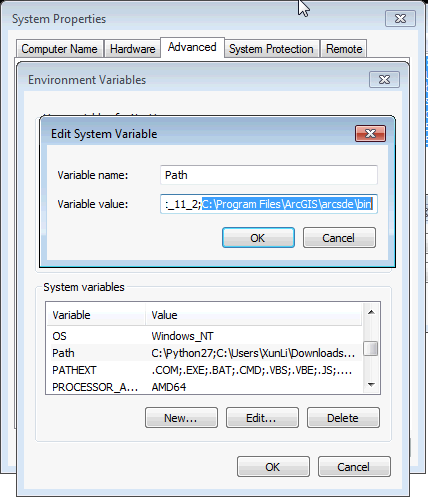
- Add the path of ESRI ArcSDE Client to PATH system variable in "System Properties" dialog (see following example)
For Windows (64-bit, only available for Esri ArcSDE 10.x):
- Download ESRI ArcSDE Client 10.x for Windows from ESRI CD-ROM
- Double click the setup executable file. The ESRI ArcSDE client will be installed to your local hard disk. For example: C:\Program Files\ArcGIS\ArcSDE
- Setup your Windows system environment for ESRI ArcSDE Client
- Add the path of ESRI ArcSDE Client to PATH system variable in "System Properties" dialog (see following example)
For Ubuntu ≥12 (32-bit):
- Download ESRI ArcSDE Client 10.x for Linux from ESRI CD-ROM
- Unzip the downloaded ZIP package to local hard drive.
- Setup your Ubuntu system environment for ESRI ArcSDE Client
- Use your editor to open ~/.bash_profile
- Add the following line at the end of the file: "export SDE_HOME=/Users/test/"
- Restart GeoDa, then you should be able to connect to the Oracle Spatial database using the GeoDa-Oracle-Plugin
For Ubuntu ≥12 (64-bit):
- Download ESRI ArcSDE Client 10.x for Linux from ESRI CD-ROM
- Unzip the downloaded ZIP package to local hard drive.
- Setup your Ubuntu system environment for ESRI ArcSDE Client
- Use your editor to open ~/.bash_profile
- Add the following line at the end of the file: "export SDE_HOME=/Users/test/"
- Restart GeoDa, then you should be able to connect to the Oracle Spatial database using the GeoDa-Oracle-Plugin